
Coroverge Brochure (PDF, opens a new tab)
PDF · discovered on the published product page. File version and current applicability require confirmation.
Dry fix roofing / Product information
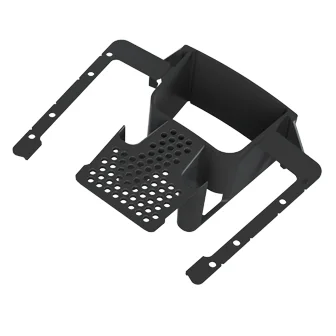
The Coroverge Starter Piece is available in a range of colours including Anthracite Grey, Brown and Terracotta.
Published product information
Easy installation - the 'True Line' Guide ensures perfect alignment with roof tiles on the roof and 'Cut Out' area provides flexibility to work around existing gutters
Selection of colours
Lightweight
Hardwearing and durable
House roof verge
Garage roof verge
Porch roof verge
Refer to Coroverge installation guide for further instructions
Installation Guidelines
The standard installation procedure should be used for new builds; for retrofitting the Coroverge System or for high wind load installations the installer should complete the additional installation tips at the end of this document.
Preparation Install the batten clips onto the end of each tile batten.a) Place the batten clip over the end of the tile batten so that the slot sits in the centre of the batten.b) Fix the clip in place by nailing 2 x 20mm length x 2.65mm diameter nails through the holes on the top of the clip into the tile batten.
Starter Piece a) Place the Starter Piece into the Verge Section and slide into the ‘locked position’. b) Remove the ‘True-Line’ guide which will not be used depending on which side of the roof where installation is taking place.
Fitting the first Verge Section Fit the Starter and Verge combination onto the first tile. If the gutter prevents the Starter Piece from sitting in the correct place, cut down the pre-marked cut lines to remove the face of the Starter Piece, always cut away from the body and wear appropriate PPE. Using the ‘True-Line’ guide screw the Starter Piece into position (small temporary screws should be used). Slide the Verge Section off the tile leaving the Starter Piece in place.Using 2 x Pozi Round Head 20mm length x 3.5mm diameter screws mount the Starter Piece to the fascia (it may be necessary to add a packer between the Starter Piece and the fascia if the tile overhang exceeds 52mm). Remove both the temporary screws and discard the ‘True-Line’ guide by bending it upwards until the snap-off feature breaks. Place the Verge Section back onto the Starter Piece and slide into the locked position. Using a 60mm nail, nail the Verge Section into the tile batten. This is achieved by nailing through the Verge Section fixing holes, through the batten clip slot and into the tile batten.
Fitting the remaining Verge Sections Open the flexible tabs at the end of the next Verge Section to allow it to fit over the previously installed Verge Section (the tabs should be first bent inwards and then flexed open). Position the next Verge Section to line up with the end of the next tile. Ensure that the ‘True Connect locators’ fit into the ‘True Mount’ of the preceding Verge Section. Adjust the flexible tabs to close off any gap between the Verge Sections. Repeat until Verge Sections reach the ridge tile.
Fitting the Ridge Cap Once both sides of the roof are complete place the Ridge Cap over the ridge tile so that it sits between the 2 verges. The flexible tabs on the ridge cap will allow it to fit with the Verge Sections installed at a number of different angles. Using the 2 x 80mm pan head screws provided, select 2 appropriate fixing holes on the ridge cap, screw through the ridge cap and into the fascia board.
Retro Fitted Installations
If the roof has a mortar bedded verge, first remove the existing mortar. Inspect the tile battens for signs of rot or damage and if necessary they should bereplaced, extended or repaired. If only the ends of the tile battens are damaged it may be possible to replace the end of the tile batten by securely fixing a short length of replacement batten to the existing batten. Once any necessary repair work has been completed on the tile battens the standard installation procedure can be followed.
Supporting resources
PDF · discovered on the published product page. File version and current applicability require confirmation.
PDF · discovered on the published product page. File version and current applicability require confirmation.
Linked in the published catalogue
Dry fix roofing
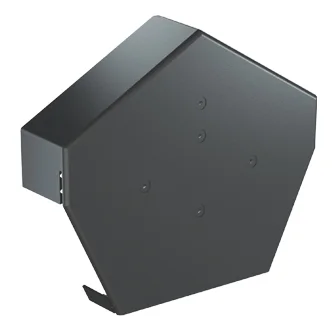
The Coroverge Universal Dry Verge System Angled Ridge Cap is manufactured from modern plastics material and available in popular Anthracite Grey, Brown and Terracotta colours. '…
View product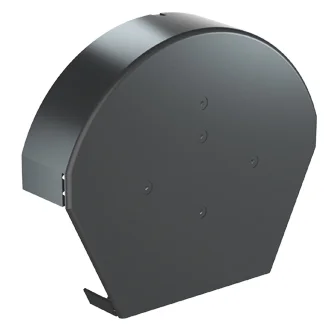
Dry fix roofing
The Coroverge Universal Dry Verge System Half Round Ridge Cap is manufactured from modern plastics material and available in popular Anthracite Grey, Brown and Terracotta colour…
View product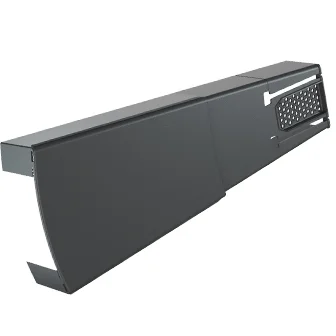
Dry fix roofing
The Coroverge Verge Section is available in Anthracite Grey, Brown and Terracotta. Designed for maximum easy installation the Verge Sections dual handed to fit both left hand an…
View productRange & components
The Corovent URS Universal Ridge System is designed to provide a totally dry fixed and weathertight ridge that is fast and simple to install.
Explore rangeRange & components
The Corovent DHS provides a mechanically fixed, weathertight and attractive finish to the hip line without the use of mortar bedding. The Corovent DHS is fully compatible with t…
Explore rangeRange & components
Coroverge is a mortar free dry verge system which acts as a closure on the roof verge of houses, garages and porches to protect tiles from wind uplift, pest infestation and weat…
Explore rangeProduct & project support
Keep this product context with your enquiry and let Ariel confirm the next step.
Content imported from Ariel’s published product information, captured 27 October 2026. Final technical/content approval is pending; current stock, delivery and warranty assurances are not asserted. Source reference (opens a new tab) ↗